
Display
The solely purpose of Prommis is to show information on screens.
In Prommis a screen with the clientsoftware or a player with the clientsoftware connected to a screen are named Displays.
On a dispay the scheduled layouts are shown. When nothing is scheduled a fall back layout is shown. This layout can be set in the display settingsdialog under ‘Default Layout'.
Register new display
As soon as a display (screen of player with installed and configured clientsoftware) is connected to the internet, the display wil reports to the CMS.
The Display overview lists the display and the column Authorization gives a 'x' when a player is not authorized.
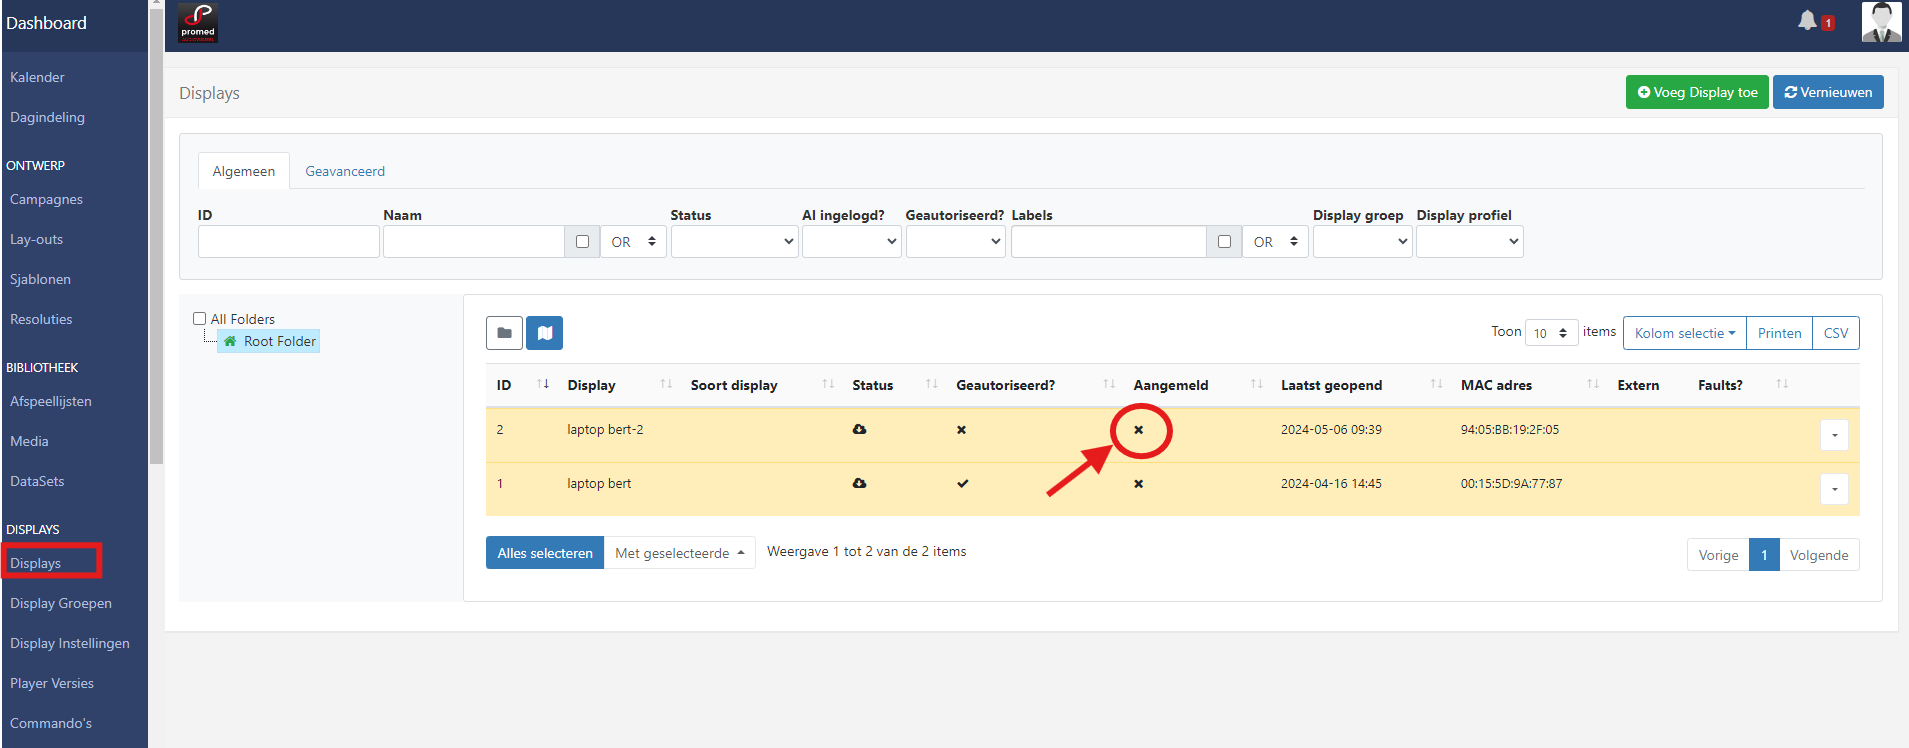
In het rowmenu → edit the authorization can be set in the field ‘Display autoriseren’.
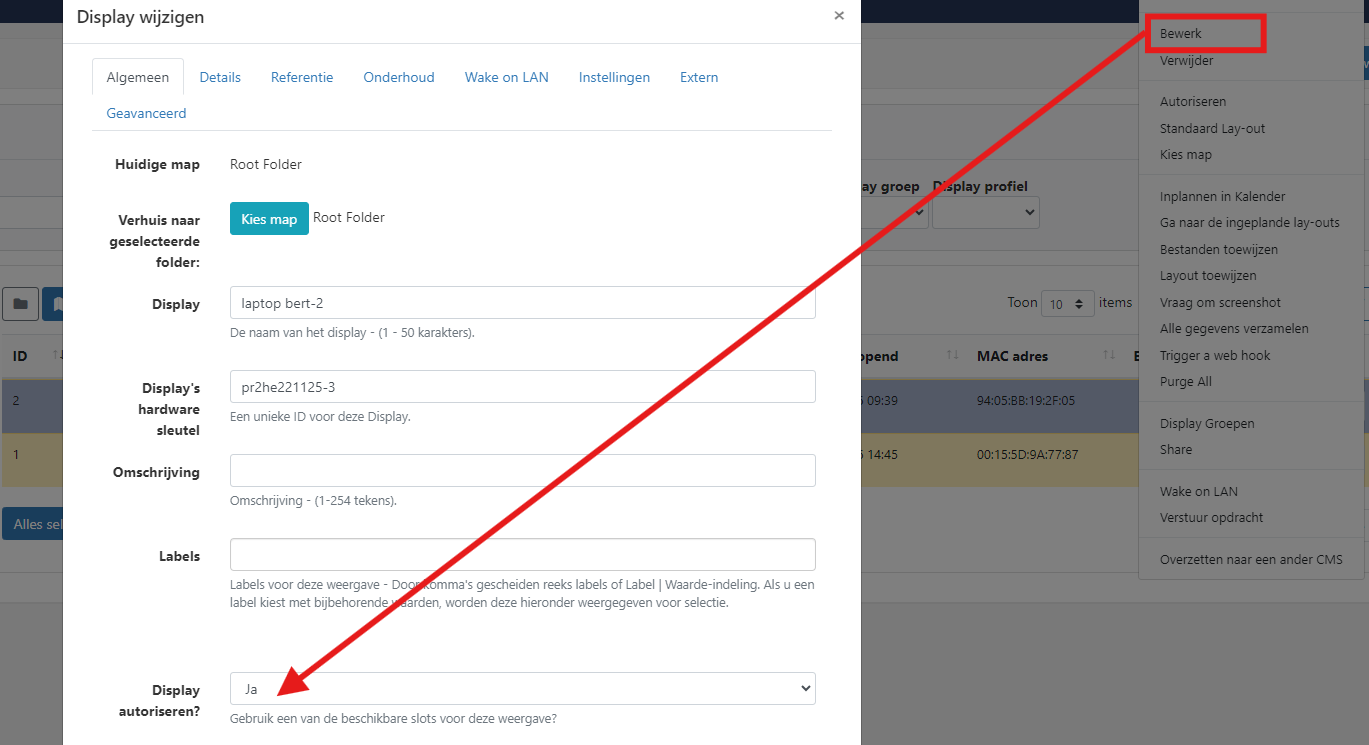
BTW: don’t forget to name the display logically, this is the name users see in the schedule. Don’t mess with the Display’s hardwarekey. This unique identifier is used for content exchange between the display and Prommis.
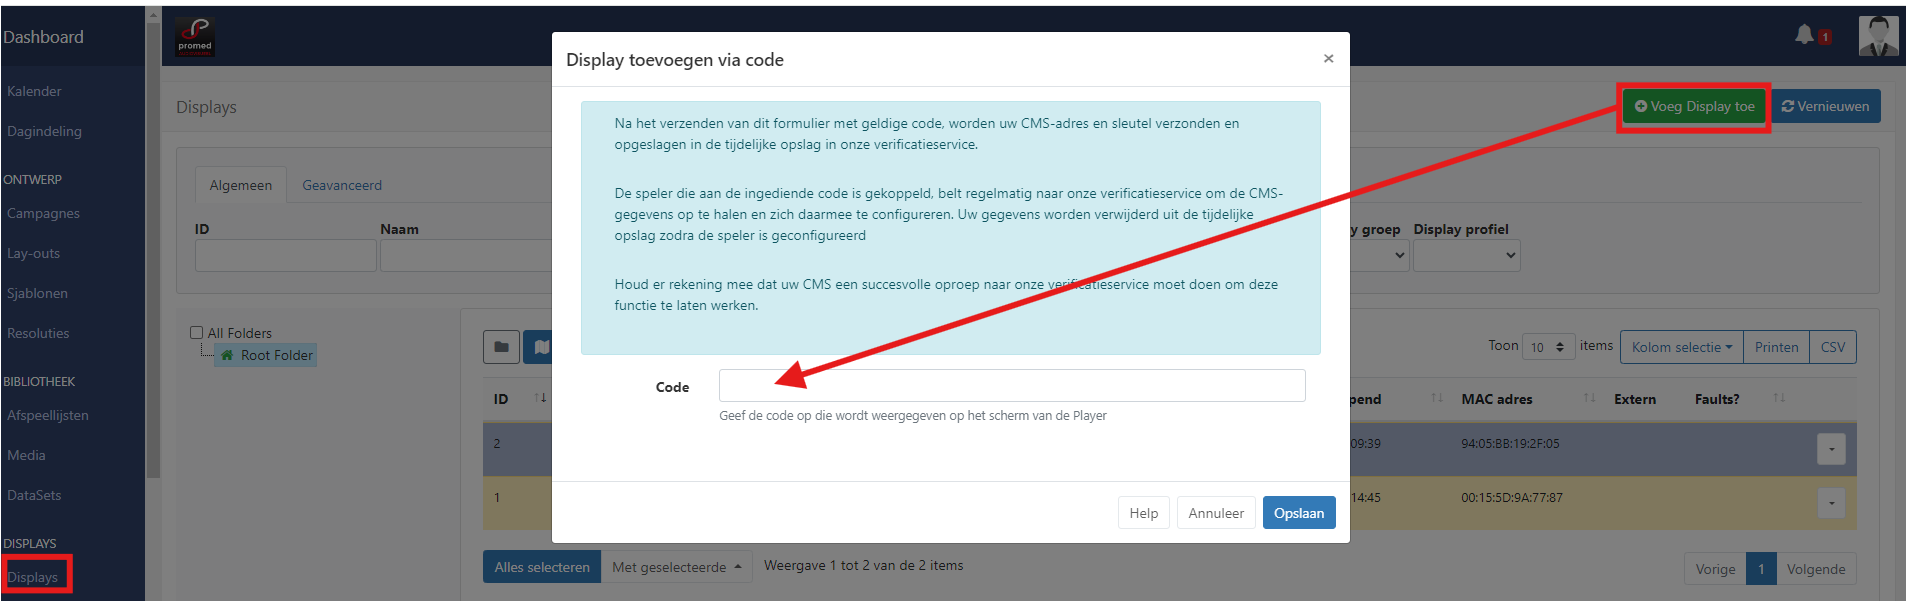
Add new display with code
An other (limited supported) register method is use of a code.
During player configuration, a tabular ‘use code’ can be used :

A 6-diget number comes up.
In Prommis the button ‘Add display’ will ask for this code. As soon as the player is configured in Prommis the display will start exchange content.
Display Administration
Displays are administered in the CMS from clicking on Displays under the Administration section of the main menu. The Displays Grid will open for you to add new and manage exiting Displays.
Click the Folders icon to toggle on/off from view.
When Folders are hidden from view, the file path for the selected folder will be shown!
-
Click on a Folder/sub-folder to search the contents and return results based on any filters applied to the grid.
or
-
Tick All Folders to include searching in the Root Folder and return results based on any filters applied to the grid.
Check out the Folders page for further information.
Next to the Folders icon is a Display Map View:
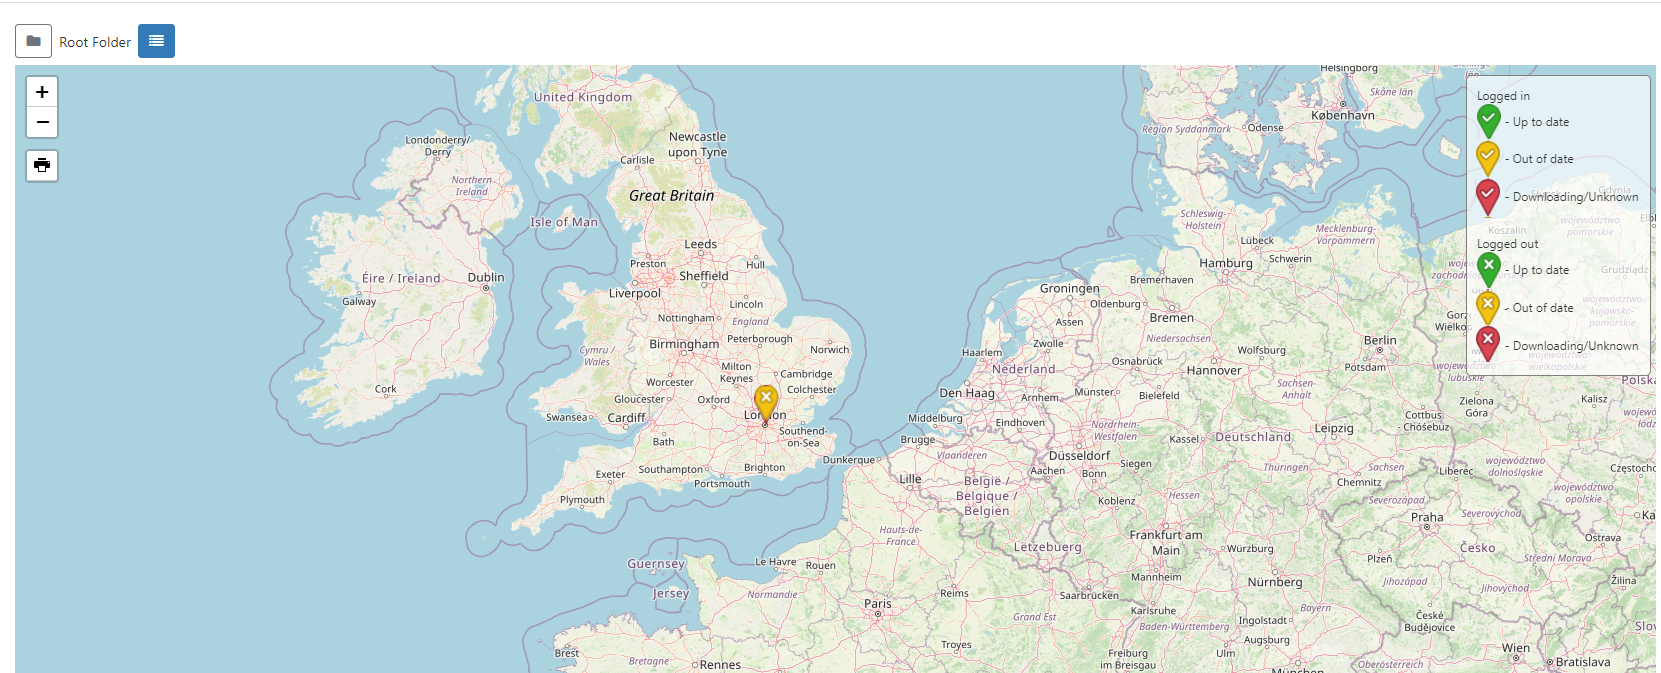
View locations on the map to easily see the status of selected or all Displays.
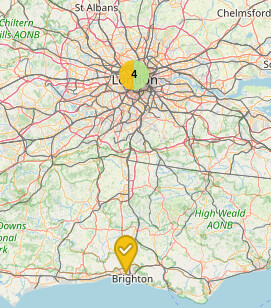
From v3.3.3 the status of Displays in marker clusters will be shown as pie charts for easier identification.
Logged in Users will only view the status of Displays that they have been given access to Use the filter fields in the grid from the List View to isolate Displays to view!
Click on a Displays status icon on the map to reveal further information:
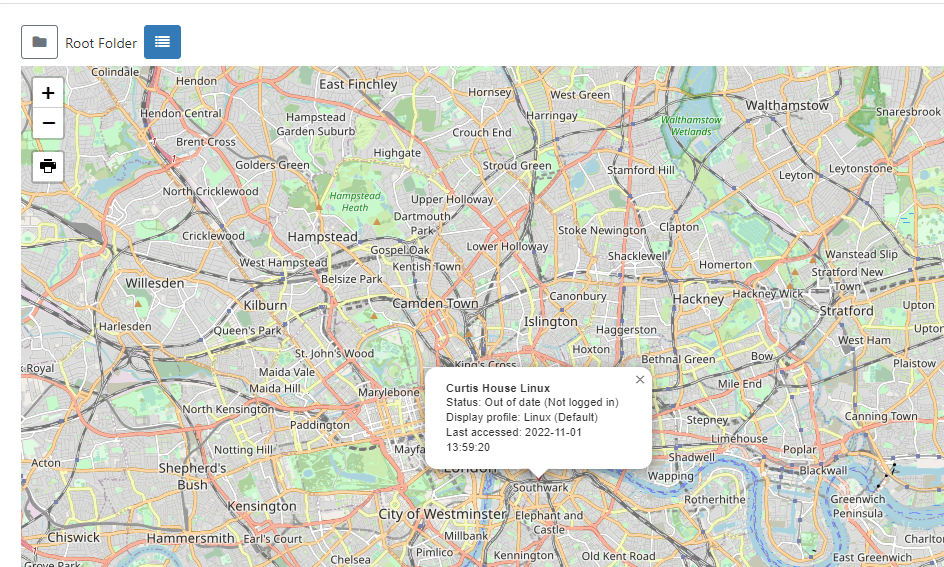
Use the blue List View button at the top of the map to return to the Display Grid.
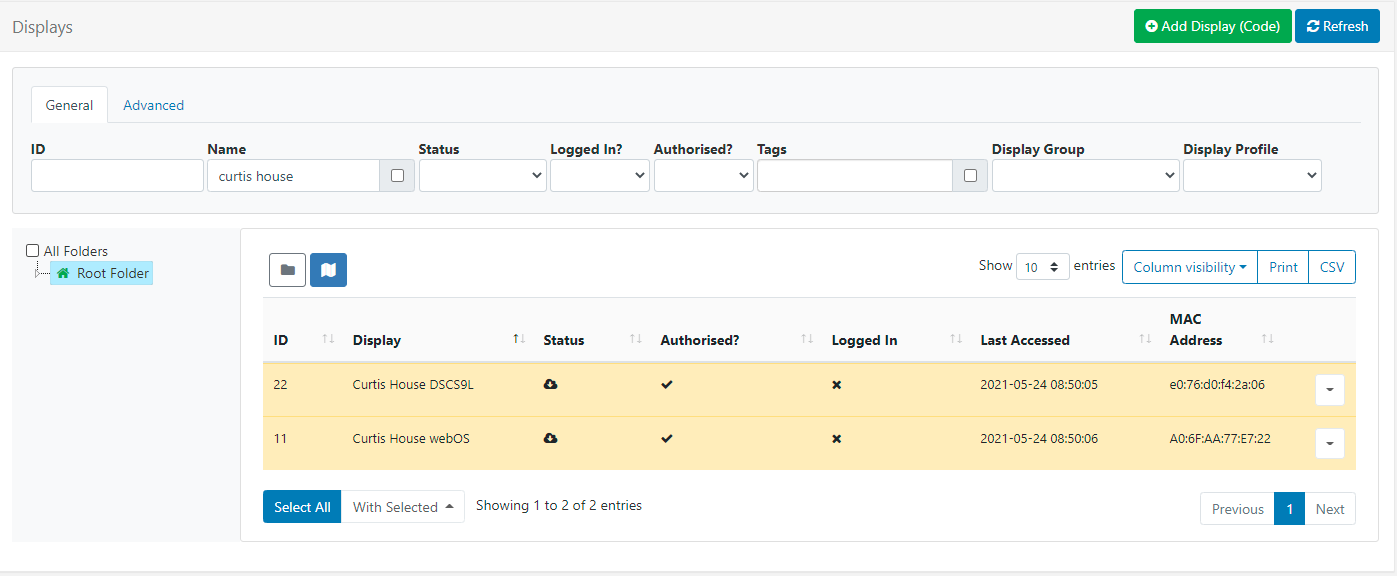
ID - Used for internal identification of a Display.
Display - Name given to the Display for easy identification purposes within the CMS (this is not shown on the Display itself).
Status - Tick = Player is up to date (this may also show as green in colour). Cloud Icon = Player has not logged in with content waiting to be downloaded (this may also show as amber in colour, as above) Cross = Player is currently downloading new content and has yet to complete the download (this may also show as red in colour)
Authorised - Tick or cross to indicate whether the Display has been granted a licence with the CMS. This prevents unauthorised Displays being added to the CMS.
Include the Commercial License column using the Column Visibility button to easily identify the Commercial Licence status of your Displays!
Logged In - Tick or cross to show if the Display has logged in recently.
Last Accessed - Date and time stamp of when the Display was last accessed.
MAC Address - Media Access Control Address of the Display (if the Player software is capable of sending it).
Use the Column visibility button to select from the available options to show the information you would like to display for your administration purposes. Deselect to remove a column from the Displays grid!
Row Menu
Each Display has a Row Menu containing a number of actions that can be performed:

Selected actions allow for Forms to be automatically submitted by clicking on the action from the Row Menu, such as Authorise and Check Licence. Actions that have an auto submit capability will display an option to enable. Take a look at Grids for further information!
Manage
Video:
Each Display has its own Dashboard which shows the Displays current status, bandwidth usage, file status and errors.
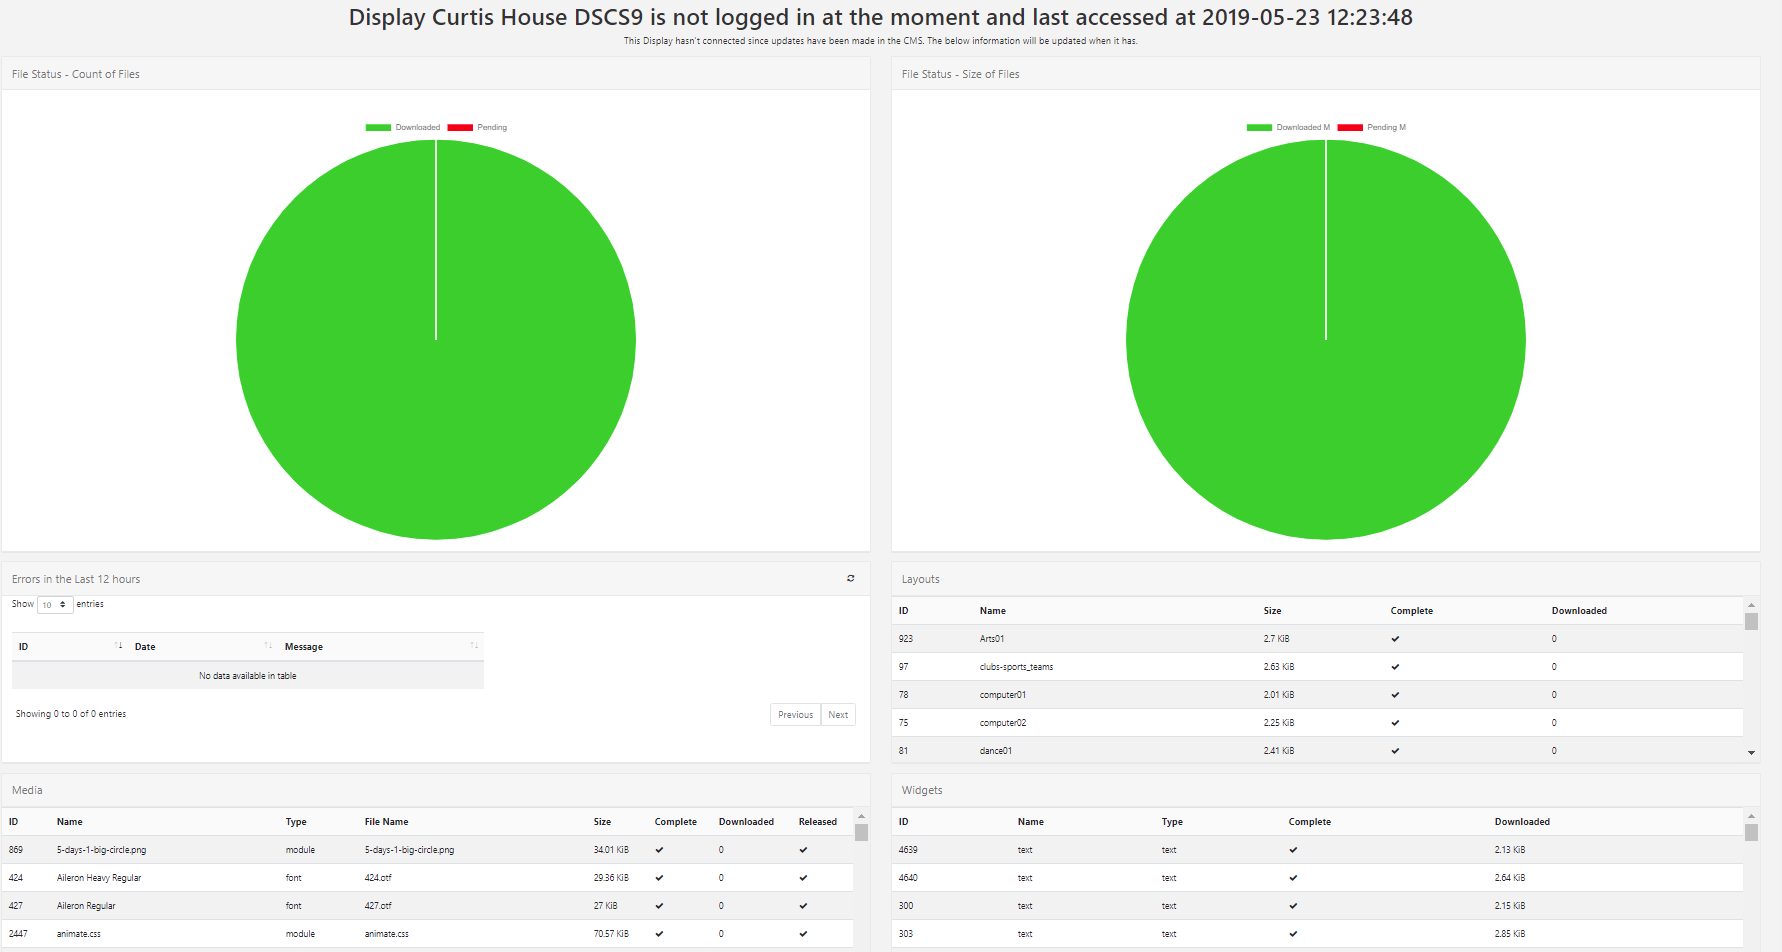
This Dashboard is useful as a first step to look at when troubleshooting issues with a Display!
inventaris
Video:
Instellingen algemeen
Video:
Clicking on Edit opens the Edit Display form which contains tabs with available configuration options:
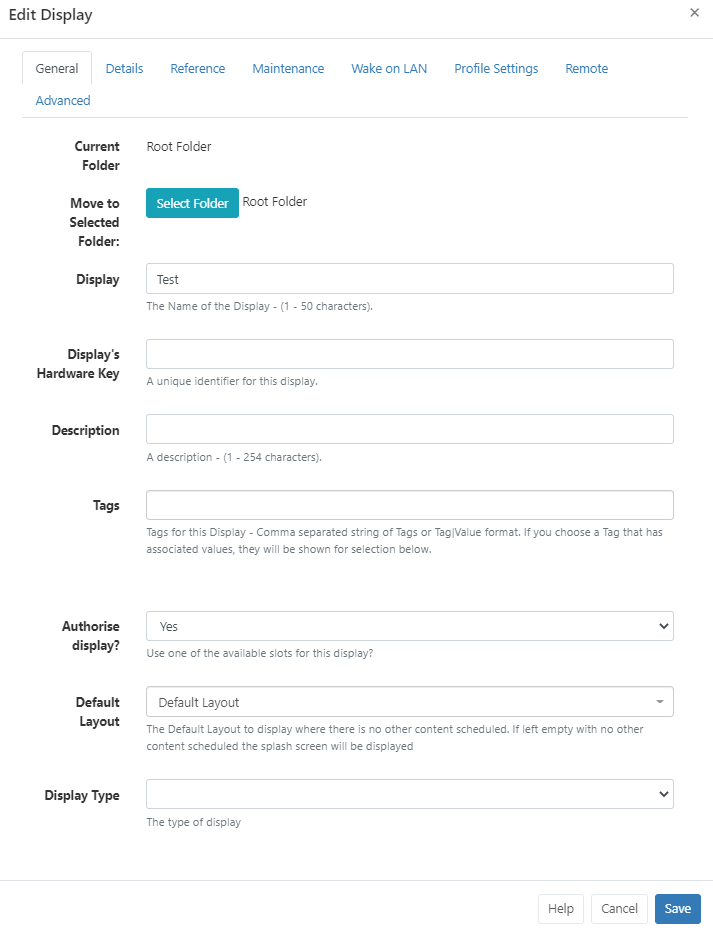
General
-
Displays can be optionally saved to Folders using the Edit form or from the Select Folder option on the Row Menu.
Displays that are saved in Folders will inherit the View, Edit, Delete Share options that been applied to the destination Folder for the User/User Group!
Assign multiple Displays to a Folder using the With Selected option at the bottom of the grid!
-
The unique Displays Hardware Key generated during installation will be shown here for the selected Display.
-
Displays can be tagged for organisation and to make it easier to find a large number of Displays all grouped by Tags. When entering text into the Tag field on the form, an auto complete helper will show possible matches to make it easier for Users to select from.
-
Use the drop down to Authorise to use an available Licence Pool slot for the Display.
-
Select a Layout to use as the Default Layout for the Display which will be shown when no other content is scheduled. If nothing is selected the splash screen will be shown instead.
-
Use the drop down to select the Display Type
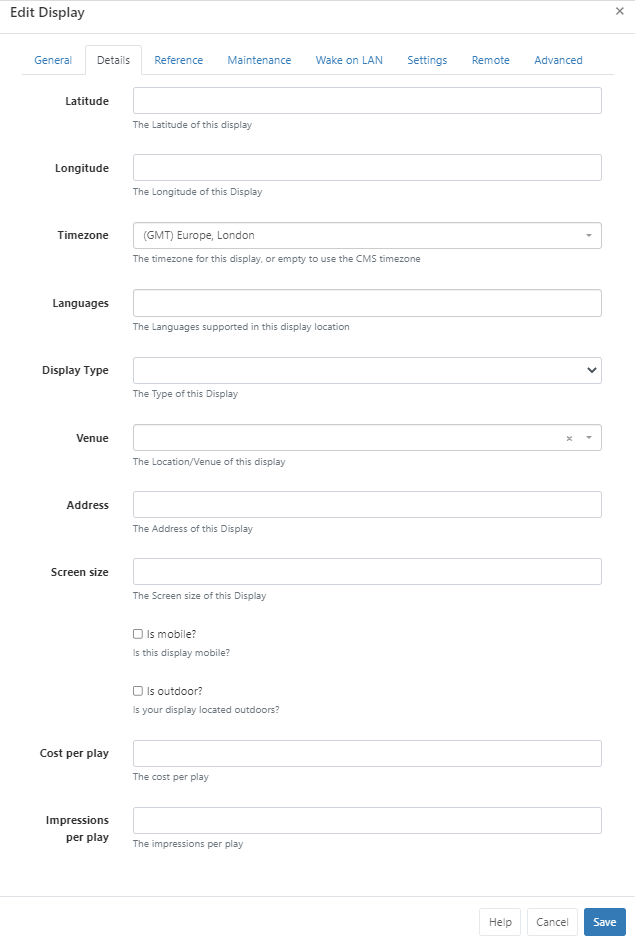
Details
Use this tab to provide further Display details:
-
If you are using the Ad Campaign functionality ensure that you complete the Cost per play and Impressions per play fields on this tab for all selected Displays.
-
Additional fields have been included designed to enhance advertising needs such as:
-
The physical address of the display
-
Is the display mobile?
-
Venue type
-
Languages supported
-
Reference
Optionally use this tab to provide reference information for the selected Displays. Once added, this information can be viewed in the Display grid and via the API.
Maintenance
Control email alerts and Global Timeout settings.
Wake on LAN
Enable Wake on LAN
Profile Settings
Override Display Profile Settings for individual Displays:
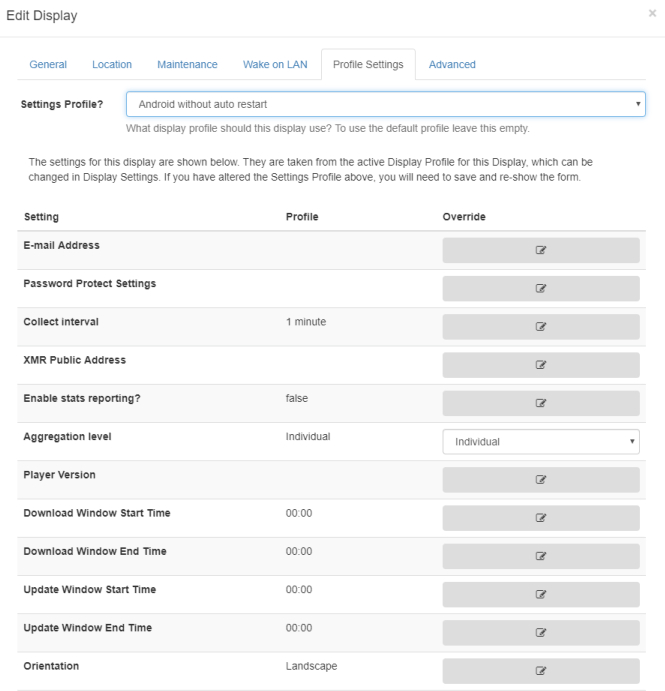
Click the edit icon to change selected settings to override the Profile.
Remote
Enter details for remote access
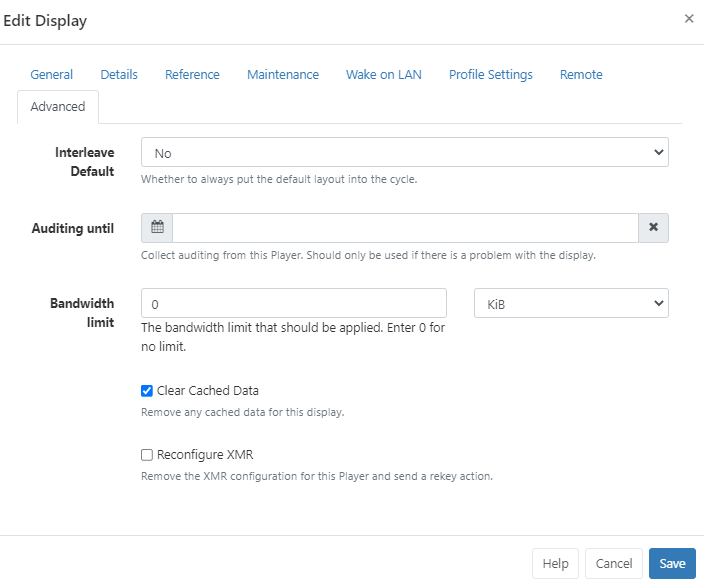
Advanced
-
Apply a limit to determine the amount of Bandwidth a Display can consume.
Set bandwidth limits for multiple Displays using the With Selected option at the bottom of the grid!
Delete
Deleting a Display will remove it from the CMS entirely - this operation cannot be reversed. A deleted Display can be reconnected to the CMS by repeating the “Register” procedure which will create a new unique Display record.
Deauthorise a Display instead of deleting so that it can be re-authorised at a later date if needed. Use the row menu for the Display and click on Authorise to toggle to Deauthorise. This can also be actioned from the Edit Display form by selecting No for Authorise display.
Send Command
The Send Command functionality is executed via XMR to Players by selecting a predefined command. This is useful for sending Players ‘Reboot’ commands for example.
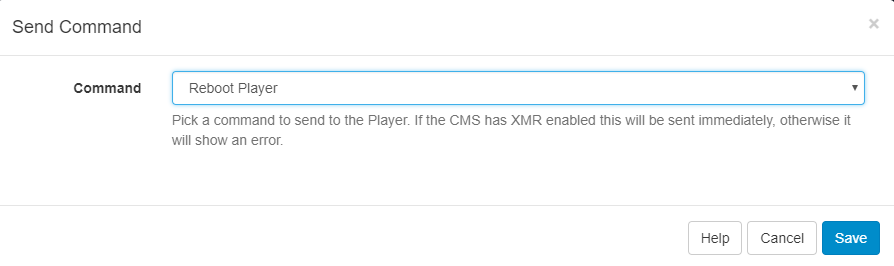
This type of Command can also be executed by scheduling a Command Event
Transfer Display to another CMS
To use this functionality you will first need to activate Google Authenticator using Two factor Authentication, if you have not already set this up.

Once activated, click on Displays from the CMS main menu and use the Row Menu to click on Transfer to another CMS for the selected Display you want to transfer.
Ensure all the form fields are completed by:
-
Entering the full CMS URL you wish to transfer this Display to.
-
Providing the CMS Secret Key for the CMS Address you wish to transfer to.
-
Complete the Two Factor authentication code, as displayed on the app.
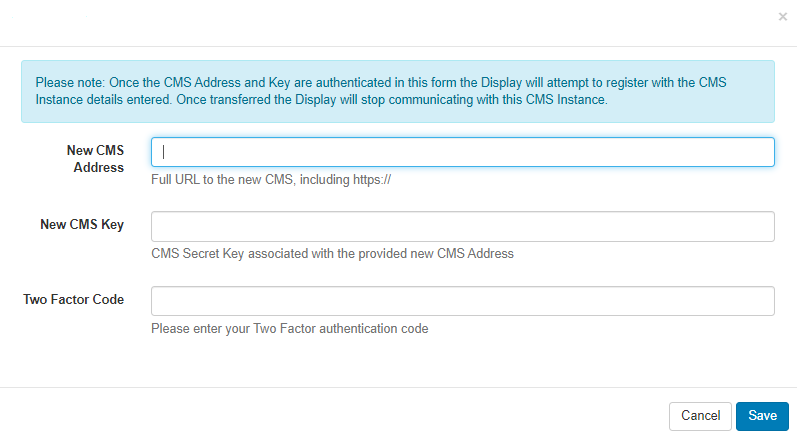
Once the details provided have been authenticated, the Display will attempt registration with the ‘new’ CMS. Once the Display has been successfully transferred the Display will stop communicating with the ‘old’ CMS and will change from a ‘tick’ to a X in the Authorised column.
Select multiple Displays to transfer using the With Selected option at the bottom of the grid!
Certain Actions from the row menu have the option to be ‘automatically submitted’, see Grids for further information!